How to Add Google Tag Manager to WordPress and Blogger
Are you new to Google Tag Manager? Confused if you will use it and how to use it? No worry, I will be sharing everything in detail about it and the best way to install and setup google tag manager…
Are you new to Google Tag Manager? Confused if you will use it and how to use it? No worry, I will be sharing everything in detail about it and the best way to install and setup google tag manager in your WordPress site.
What is Google Tag Manager
Google Tag Manager is free service of Google. It helps you keep all your tracking code, verification code or other HTML code in a place. You don’t need to place tracking or verification JavaScript codes in your website.
You just have to place tag manager code in your website and it will handle all other codes itself. Thus you can minimize external JavaScript file loading time and external request. So it maters in your website speed.
There are many built in templates of Google Analytics, AdWords, DoubleClick, and several third party platforms.
What are the Uses of Google Tag Manager
- Add Google Analytics to your Website
- Add Third party Tracking or Verification Code
Currently all the developers and professional are using this. So I think it is a good decision to use google tag manager for your site.
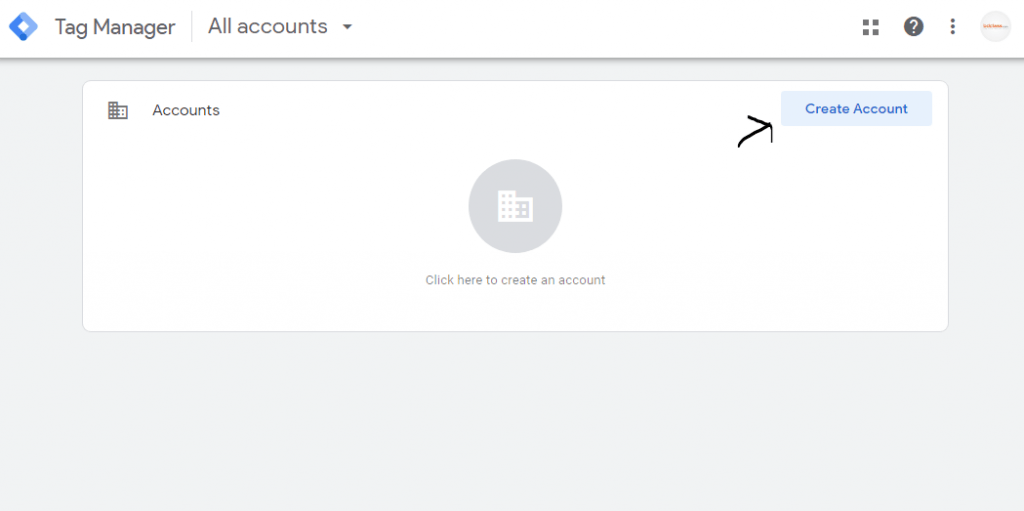
Create Google Tag Manager Account
First you have to create a Google Tag Manager Account form here.
Now fill up the necessary information in next form.
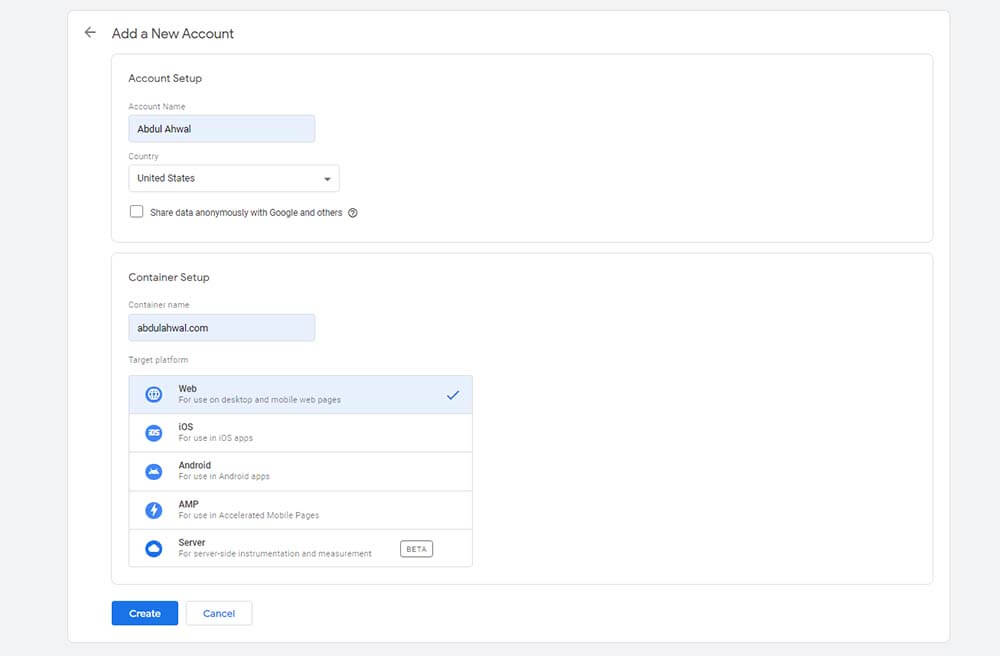
Here write your business name or your project name as Account name. Select your country and write your domain name (domain.com) in the container name. Don’t use www before the domain. You can use if you like. To me this is useless now a days.
Now you are to select what platform you want to use. Normally you would want to use google tag manager for your website. So, select Web and click on create button.
You have to agree terms and conditions of using google tag manager. Click on Yes. You might read the full story there if you want. After that everything will be ready within seconds.
You’ll find 2 codes there looking like the image bellow.

This step is something if you are very new to WordPress. Normally we have to put two HTML Codes – one in the Head Tag <head> and the other is after the Body Tag <body>
Let’s see how you can install the 2 codes in your WordPress or Blogger website
Install Google Tag Manager in WordPress
We can install Tag Manager in 2 ways, 1) With a plugin (Not Recommended) and 2) With Child Theme by editing code.
If we use too much plugins, our site will be heavier and slower. So, we should try not to use unnecessary plugins. Let’s see the process of adding Google tag manager in both the ways.
Method 1: With a Plugin
Here, we’ll use a simple but useful plugin so you don’t need to edit your website’s HTML code.

Login to your WordPress admin panel. Go to Plugins > Add New. Search for ‘Post Injections’ and find the Head, Footer and Post Injections plugin. Install and Activate the plugin. This plugin will add a new option in your WordPress Settings.
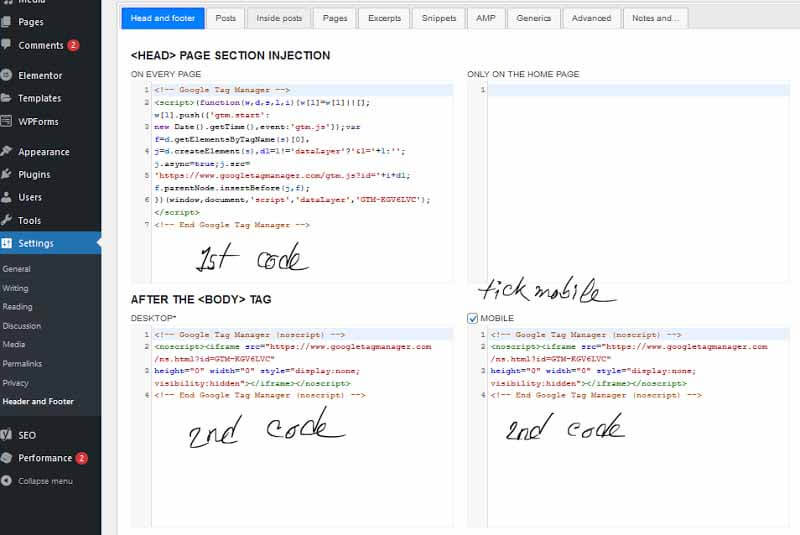
Now go to Settings > Header and Footer. Install the first Code in <HEAD> page section and the 2nd Code in After <BODY> tag section. See the image bellow.
Hope, Google Tag Manager is successfully installed. Now check it the tag is working perfectly.
To check if the code is installed properly, install Tag Assistant in your chrome or edge browser. Visit your website and check if google tag manager is installed.
Install Google Tag Manager in Blogger
In Blogspot/Blogger you can also use google tag manager. This process is very easy to do. Here we’ll edit website’s theme code. Don’t worry, you can easily do it.
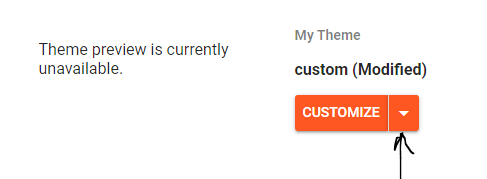
From blogger dashboard, go to Theme option.
Click on arrow icon and first download a backup for your safety. Then again click on arrow and select
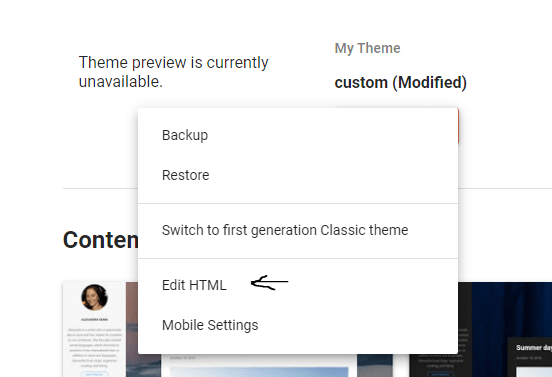
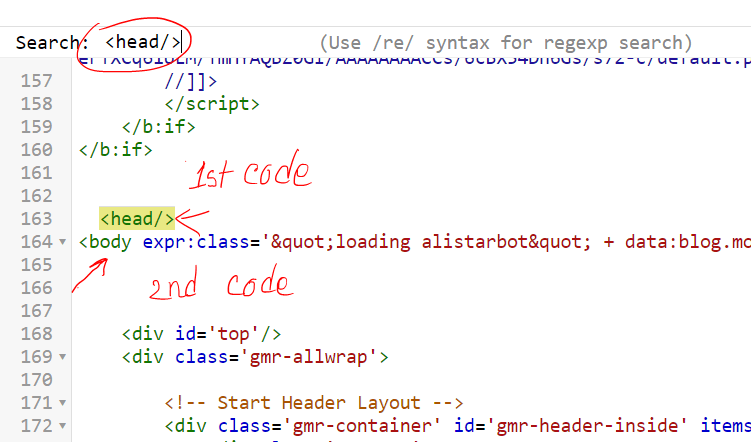
Type CTRL + F and search for the tag <head/>. Now place the 1st code just before the <head/> tag. After this line, you will see beginning <body> tag. Place the 2nd tag after the <body> line. See the picture below for better understanding.
You have done it. Now click the Save button on the right top. To check if the code is installed properly, install Tag Assistant from Chrome Webstore in your browser. Now visit your website and check the code is working fine.