How to Add Google Analytics to Your WordPress Site
Hey blooger, how is going? Hope you are very excited with your new site. Today I’m going to show you how you can track and get detailed information about your visitors. For this, you need to use Google Analytics, a…
Hey blooger, how is going? Hope you are very excited with your new site. Today I’m going to show you how you can track and get detailed information about your visitors.
For this, you need to use Google Analytics, a free tools for webmasters. With Google Analytics you can track all the information about your real time visitors. You can know their behavior and what they want. Thus you can publish better content to your users.
So, lets create a Google Analytics account first.
Create a Google Analytics Account
If you are creating a google analytics account for the first time, you might be confused. Don’t worry, it is very simple. I’ll show you step by step.
Step 1: Go to Google Analytics and log in with your google account. Then click Start Measuring button.
A form will come on the next step. Here give an account name. It may be your website, business or project name.
Now select data sharing options. It is better to keep as it is default set. Just click on the next button and move on the Property Setup.
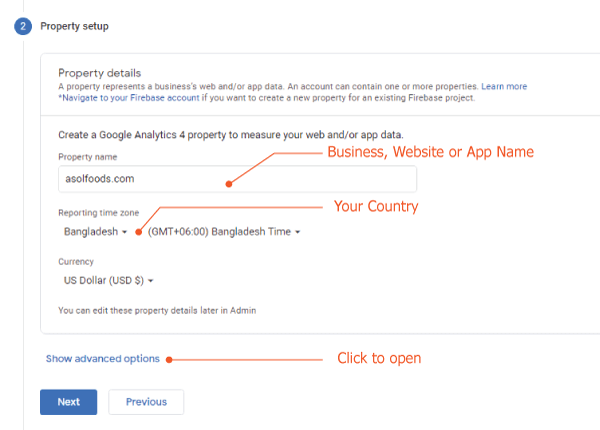
Step 2: On Property setup, write your website name as property name. Select your country and what currency you want to set. Most of the people normally keep it USD. It depends on your business country or main visitors country.
Then click to show advanced options.
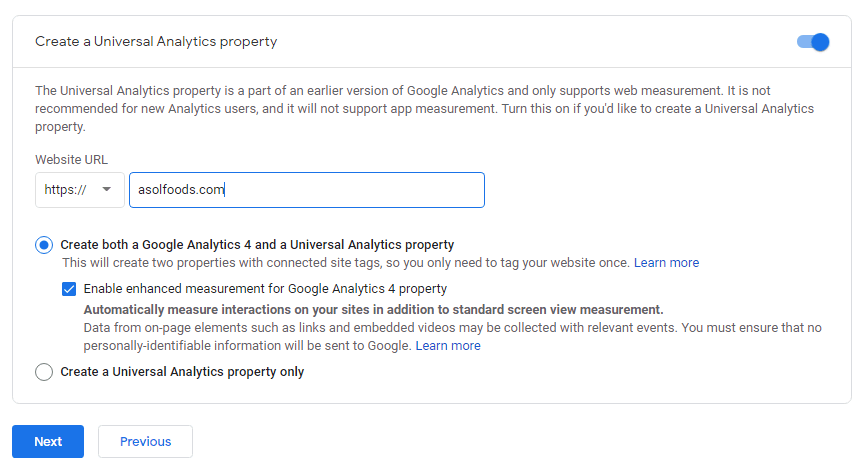
One very important thing is Universal Analytics Property. Google Analytics have 2 versions. The older version is Universal Analytics Property which only for Web Analytics.
On the other hand, Google Analytics GA4 is for not only for web, but also for app analytics.
But we are going to create the both. If you are to use only for website. You can select 2nd option- Create a Universal Analytics property only. So click next to move on 3rd Step.
3rd Step: Here you have to give information about your business. Select your most suitable business category and Business size. At last, tick all the options why you are using Analytics.
Everything is now set to create a Google Analytics Account. Click create and accept terms of service.
Hope you are successfully done. You will see a page containing your analytics ID and setup information.
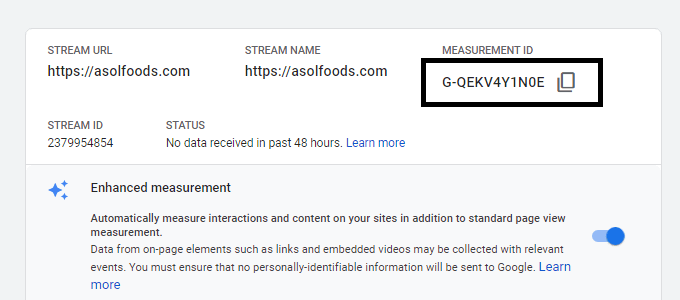
On the next page you will find a Measurement ID and Tracking Code (gtag.js). With this ID or Tracking code you can install google analytics to website.
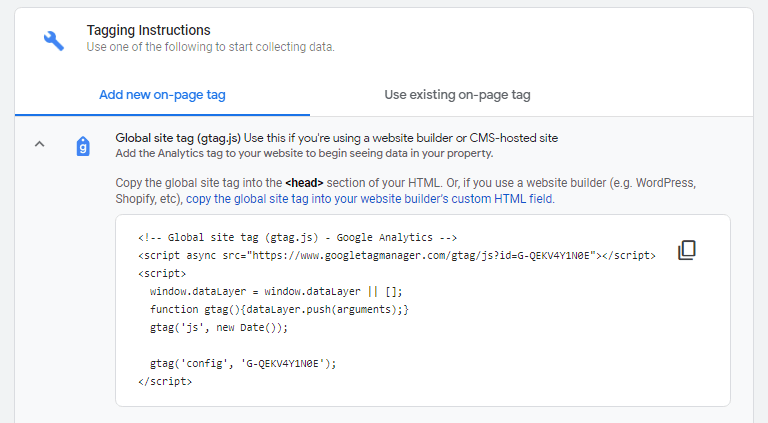
Let’s see how to add Google Analytics to your WordPress Site.
Method 1: Add Google Analytics through Google Tag Manager
It is a good practice to use Google Tag Manger for installing all the 3rd party tracking and verification codes.
Step 1: Create google tag manager account and install it to your WordPress site.
Step 2: Setup Google Analytics in Tag Manager.
Hope already you are ready with your tag manager account. Now you just have to put your Measurement ID inside the Tag Manager.
You can find you Measurement ID from Google Analytics admin panel. For this, go to Admin.
Now Select your Account > Select Property : GA4 (123xxxxxx) > Data Stream
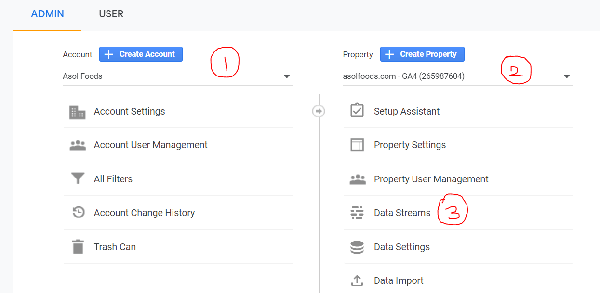
Now click on your website URL and find Measurement ID and setup information
Setup Google Analytics in Tag Manager
Login to the Tag Manager dashboard. From left side menu, go to Tags > New > Tag Configuration > Google Analytics: GA4 Configuration.
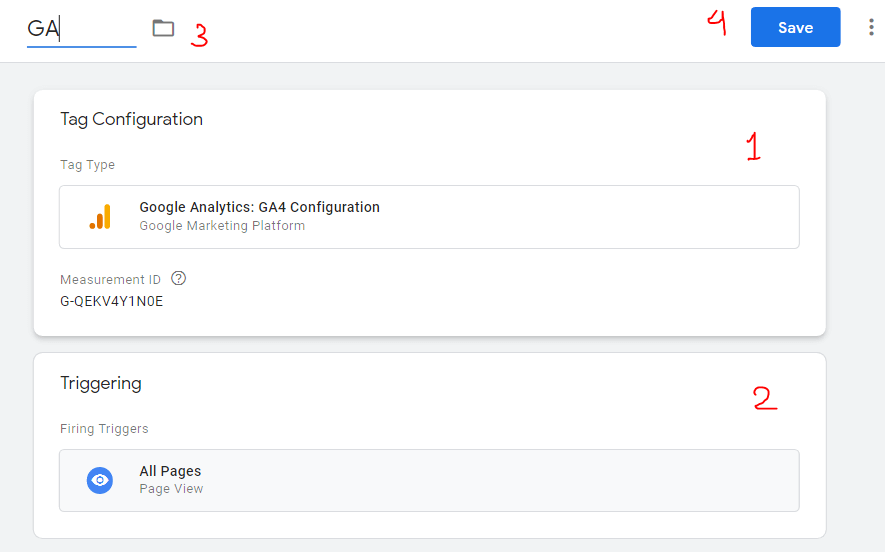
Now put your Google Analytics Measurement ID in the box. After that click Triggering and select All Pages. Give a name of the tag and save the tag.
Finally you have to publish the tag. So click on Submit button. Write “Web” or any other text as version name and publish your tag.
You are done. You have successfully installed Google Analytics in Tag Manager.
One more important thing is adding your website to Google Search Console to monitor your ranking and website performance. If you have not added, add your website to Google Search Console and Bing Search Console now.

